

CROSSLINK SPEAKER
TIMELINE
Product Prototyping
14 Week Project
TOOLS
Model Shop
Spray Paints
Illustrator
Solidworks
Keyshot
OBJECTIVES
Product Study
Sketching
Drafting
Prototyping
Product Fabrication

DESIGN BRIEF
Design a functional speaker using existing speaker component that emphasizes concept development and hand-building


Credits: Viva La Vida by Coldplay
SPEAKER TEARDOWN
As I disassembled this Doss speaker, 3 main questions were constantly in my mind.


How does each part function?
What can be modified or improved?
How do the parts assemble on the redesign?
INSPIRED BY BRIDGES
For my speaker, I envisioned a design that conveys grandiose and boldness, and found my inspiration in the immense scale and distinct appearance of bridges.
ARCHED
STRUCTURED
LINKED


BRIDGES TO SPEAKERS
.png)
.png)
.png)
.png)

I settled on this compact and simple design, which I further developed its interactive capabilities. Keeping the design portable while also allowing it to be settled at home.

BRIDGING THE GRILL
Now, the form was fairly plain and needed more style. So I began to think, how could I make this speaker more unique? This thought led me to a process of creating a distinct appearance for the grill.


Complete circular connection through reflection in water
Ropes extending out and holding the bridge to the arches
Modular bridge connected through two rotating platforms
Continuous lines following the curvature of the bridge
Multiple intersections into the bridge


GRAND TILT
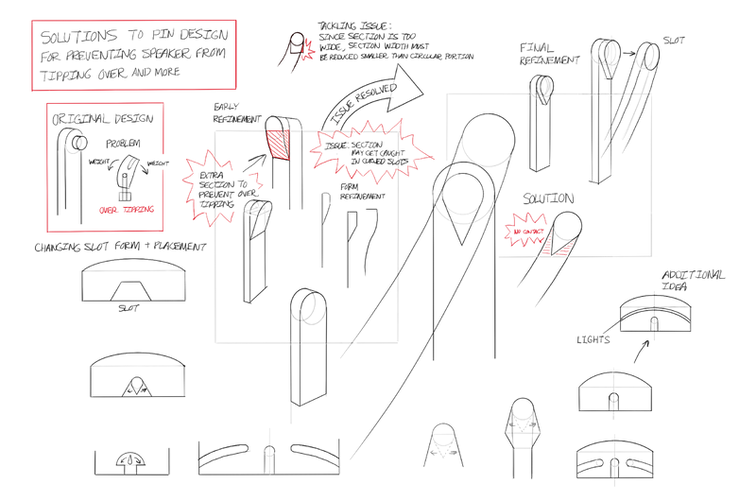
The pure verticalness of the speaker and stand was too stale, so I made a solution to create more visual interest by tilting the speaker with no mechanical parts.
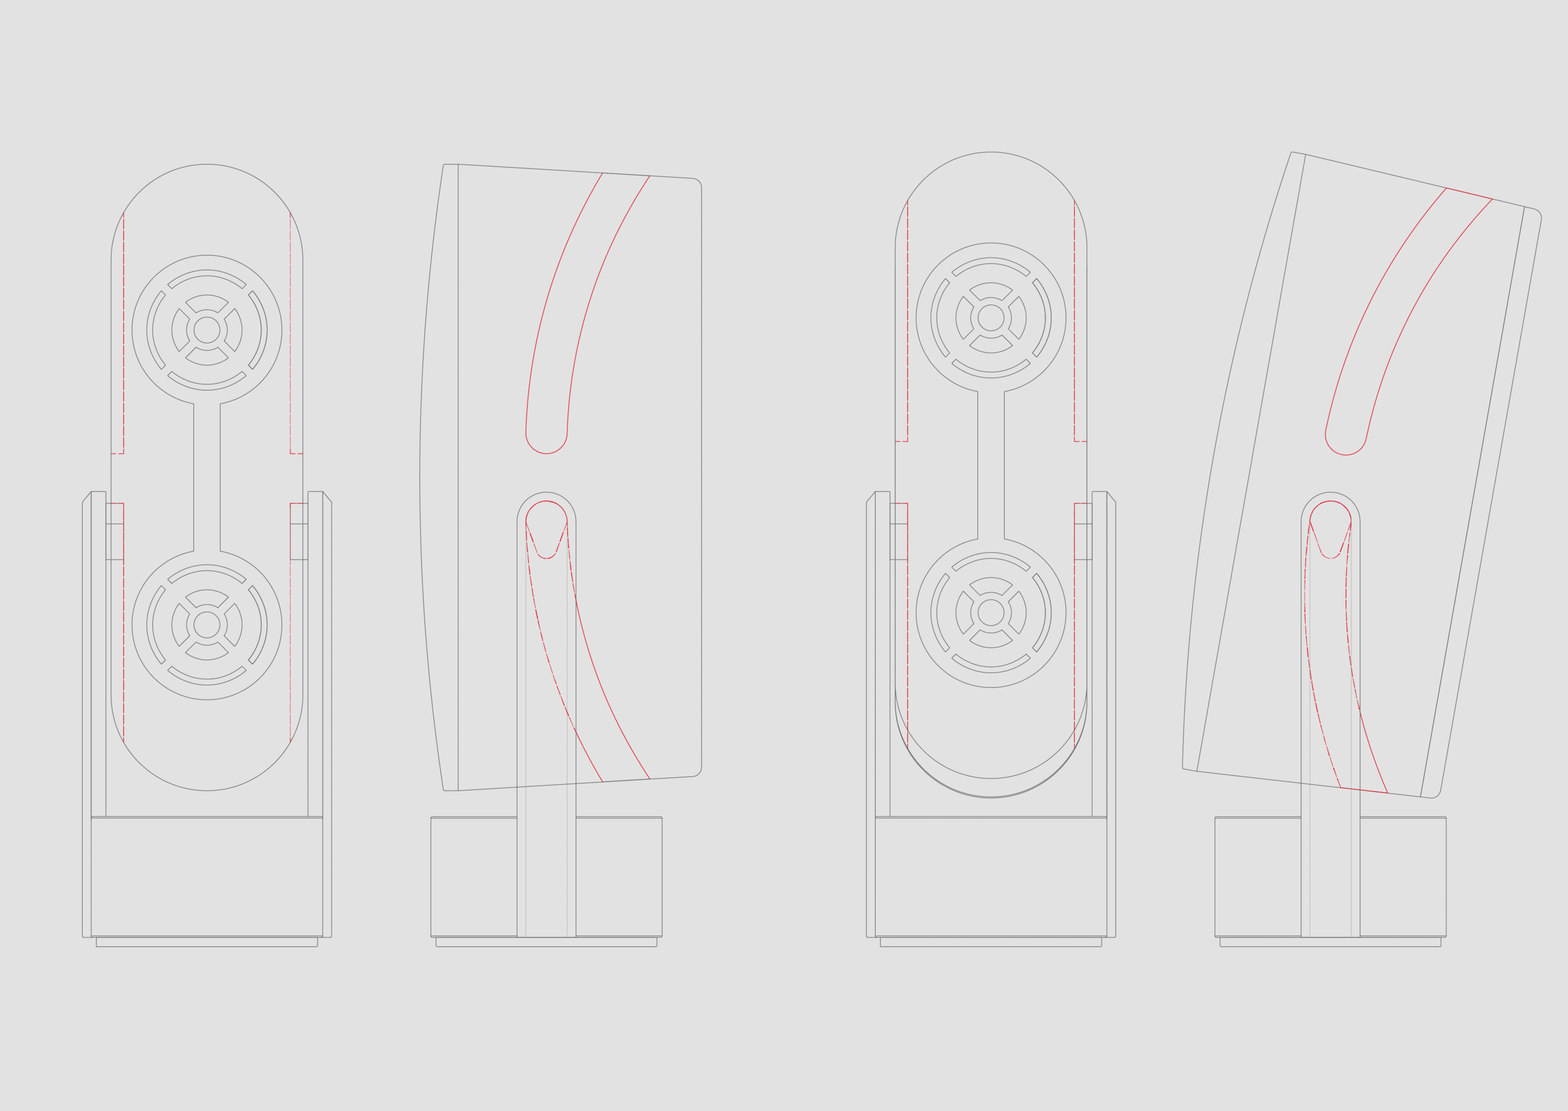
TILT IN ACTION!

My solution to achieve this tilting feature was through a simple change in form. By turning the circular pin to a flipper shape like in pin ball, this enables the speaker to stand vertically or tilt.

THE EVOLUTION OF CROSSLINK
In total, I made 5 versions and 6 prototypes of my speaker concept. Each prototype was a lesson that lead to an incremental improvement for the overall design.
RAPID PROTOTYPES
The prototypes below show the progression from a rough concept to a near-functional appearance model, revealing challenges that shaped the final design.

Appearance model
Fitting components 2
Refined exterior
Fitting components
Fixing front plate and attachment
Rough form
FRONT

BACK





VERSION 5 (FINAL)


EXPLODED COMPONENTS
Upon completing my final orthographic drawings and having all the parts properly fit. I moved onto creating 3D visuals for presentation.
.png)
FULLY CAD MODELED
After the project, I recreated the speaker in SolidWorks using the exact part drawings and modeled every component. This helped refine my orthographic drawings.


CMF THAT EXPRESSES THE DETAILS
For my decision in CMF, I chose a subtle and neutral color palette that accentuates the details in the form and functions of the design.


BUILDING TO THE FINAL
Even after overcoming the many challenges from the different stages of design, the final working model was the pinnacle challenge.
ALL 125 STEPS


CROSSLINK SHOWCASE


KEY TAKEAWAYS
Understanding the product's components thoroughly to build a well-rounded product
Resolving technical problems with constant prototyping
Being purposeful in every part of the design